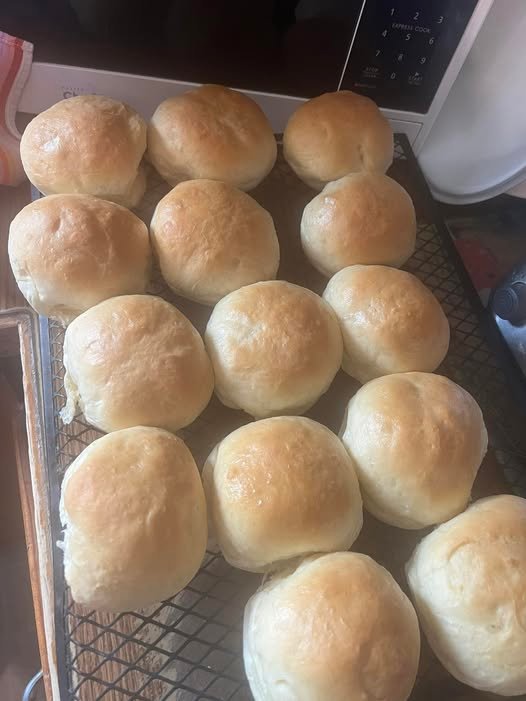
Homemade Buns: Soft, Fluffy, and Perfect for Any Meal
There’s nothing quite like the smell of freshly baked buns coming out of the oven. Whether you’re making burgers, sandwiches, or breakfast sliders, homemade buns are soft, fluffy, and more flavorful than store-bought versions. With a few simple ingredients and a little patience, you can create buns that are golden brown on the outside and tender inside.
Homemade buns are also highly versatile—you can make them plain, add herbs or seeds, or even make them slightly sweet. Perfect for family dinners, BBQs, or special occasions.
Why You’ll Love This Recipe
- Soft and fluffy: Light, airy, and tender crumb.
- Customizable: Add sesame seeds, poppy seeds, or herbs for extra flavor.
- Perfect size: Great for burgers, sandwiches, or mini sliders.
- Kid-friendly: Fun to shape and bake, making cooking interactive.
Ingredients (Makes 8–10 buns)
- 4 cups (500 g) all-purpose flour
- 2 ¼ teaspoons (1 packet) active dry yeast
- 1 cup (240 ml) warm milk
- 3 tablespoons sugar
- 2 tablespoons unsalted butter, melted
- 1 teaspoon salt
- 1 large egg
- Optional toppings: sesame seeds, poppy seeds, or coarse salt
Step-by-Step Instructions
1. Activate the Yeast
- In a small bowl, combine warm milk, sugar, and yeast. Let sit for 5–10 minutes until frothy.
2. Make the Dough
- In a large mixing bowl, combine flour and salt. Add the yeast mixture, melted butter, and egg.
- Knead until the dough is smooth and elastic, about 8–10 minutes. You can knead by hand or use a stand mixer with a dough hook.
3. First Rise
- Place dough in a lightly greased bowl and cover with a damp towel or plastic wrap.
- Let rise in a warm place for 1–2 hours, or until doubled in size.
4. Shape the Buns
- Punch down the dough to release air. Divide into 8–10 equal portions.
- Shape each portion into a smooth ball and place on a parchment-lined baking sheet.
5. Second Rise
- Cover the shaped buns and let rise for 30–45 minutes, until puffy.
6. Preheat Oven
- Preheat oven to 375°F (190°C).
7. Egg Wash and Toppings
- Brush buns with a beaten egg for a shiny finish. Sprinkle with sesame seeds, poppy seeds, or coarse salt if desired.
8. Bake
- Bake for 15–20 minutes, until golden brown on top.
- Remove from oven and cool on a wire rack.
Tips for Perfect Buns
- Warm milk: Helps activate yeast faster and promotes a soft crumb.
- Do not over-knead: Kneading develops gluten, but over-kneading can make buns tough.
- Second rise is essential: Skipping this step can result in dense buns.
- Optional butter brushing: Brush tops with melted butter after baking for extra flavor and softness.
- Make ahead: Dough can be prepared in advance and refrigerated overnight for convenience.
Variations
- Sweet Buns: Add 2 tablespoons sugar to the dough and brush with a sugar glaze after baking.
- Herb Buns: Mix in chopped rosemary, thyme, or oregano for savory buns.
- Seeded Buns: Top with sesame seeds, poppy seeds, or sunflower seeds for texture and flavor.
- Mini Slider Buns: Make smaller portions for bite-sized sandwiches or appetizers.
Serving Suggestions
- Classic Burgers: Perfect base for beef, chicken, or veggie burgers.
- Sandwiches: Fill with deli meats, cheese, or grilled vegetables.
- Breakfast Sliders: Use for egg and bacon sandwiches or mini breakfast sliders.
- Snack: Serve with butter, jam, or honey for a quick snack.
Storage
- Store cooled buns in an airtight container for 2–3 days.
- Freeze for up to 2 months; thaw and warm before serving.
- Reheat in the oven or toaster for best texture.
Why This Recipe Works
The combination of yeast, warm milk, and butter ensures that the buns rise properly while remaining soft and tender. Two rises, gentle kneading, and proper baking create buns that are golden on the outside and fluffy on the inside, perfect for all your sandwich needs.
Final Thoughts
Homemade buns are simple, versatile, and delicious. They elevate any sandwich, burger, or breakfast dish, and the satisfaction of making them from scratch is unbeatable. With this recipe, you can enjoy soft, fluffy, and golden buns anytime you like, impressing family and friends with your baking skills.