High Protein Cheesecake Jars: A Guilt-Free Dessert
Craving cheesecake but want a dessert that’s high in protein, low in guilt, and easy to make? These High Protein Cheesecake Jars are the perfect solution. Creamy, indulgent, and conveniently portioned, they satisfy your sweet tooth while providing a healthy dose of protein—ideal for post-workout treats, snack time, or even breakfast.
Unlike traditional cheesecake, which can be heavy in sugar and fat, these jars use high-protein ingredients, natural sweeteners, and a lighter base, making them both nutritious and delicious. Plus, serving them in jars makes them portable, Instagram-worthy, and portion-controlled.
Yield: 4 jars
Prep Time: 15 minutes
Chill Time: 2–3 hours
Total Time: 2 hours 15 minutes
Ingredients
This recipe makes 4 individual jars.
Crust:
-
½ cup almond flour
-
2 tablespoons oats (optional for texture)
-
1 tablespoon melted coconut oil or butter
-
1–2 teaspoons sweetener (maple syrup, honey, or your favorite low-calorie option)
-
Pinch of salt
Cheesecake Filling:
-
200 g (7 oz) cream cheese, softened
-
½ cup Greek yogurt (full-fat or 2% for creaminess)
-
2 scoops vanilla protein powder (whey, casein, or plant-based)
-
2–3 tablespoons sweetener (adjust to taste)
-
1 teaspoon vanilla extract
-
Juice of ½ a lemon (optional, for a tangy kick)
Optional Toppings:
-
Fresh berries (strawberries, raspberries, blueberries)
-
Chopped nuts (almonds, pistachios, pecans)
-
Sugar-free chocolate chips or cacao nibs
-
Drizzle of nut butter or low-calorie caramel
Equipment Needed
-
4 small jars (100–150 ml each)
-
Mixing bowls
-
Electric hand mixer or whisk
-
Spoon or spatula
-
Measuring cups and spoons
Step 1: Prepare the Crust
-
In a small mixing bowl, combine almond flour, oats, melted coconut oil, sweetener, and a pinch of salt.
-
Stir until the mixture resembles wet sand and holds together when pressed.
-
Divide the crust evenly among the jars and press down gently using the back of a spoon to form a firm base.
Tip: For extra flavor, add ½ teaspoon cinnamon or a splash of vanilla to the crust mixture.
Step 2: Make the Cheesecake Filling
-
In a medium bowl, beat the cream cheese and Greek yogurt together until smooth and creamy.
-
Add the protein powder, sweetener, vanilla extract, and lemon juice. Beat again until fully combined.
-
Taste and adjust sweetness or lemon juice as desired.
Pro Tip: If the mixture is too thick to pipe or spoon easily, add 1–2 tablespoons of milk or unsweetened almond milk to loosen it slightly.
Step 3: Assemble the Jars
-
Spoon or pipe the cheesecake filling evenly over the prepared crust in each jar.
-
Smooth the top with the back of a spoon or a small spatula.
-
Optional: Add a layer of fresh berries in the middle for a fruity twist, or sprinkle some crushed nuts on top.
Step 4: Chill
-
Cover the jars with lids or plastic wrap.
-
Refrigerate for at least 2–3 hours, or overnight for the best texture. The cheesecake filling will firm up nicely and develop a creamier consistency.
Tip: If in a hurry, you can place the jars in the freezer for 30–45 minutes to speed up setting.
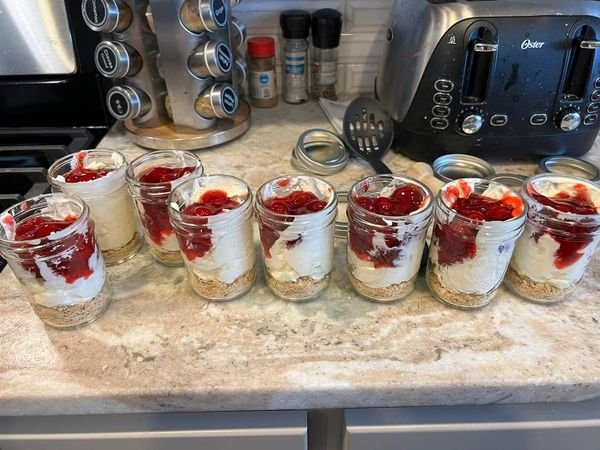
Step 5: Serve
-
Remove the jars from the fridge.
-
Add fresh toppings like berries, nuts, or a drizzle of nut butter for flavor and visual appeal.
-
Enjoy directly from the jar for a convenient, single-serve dessert.
Bonus: These jars are perfect for meal prep—they stay fresh in the refrigerator for up to 3–4 days.
Variations and Flavor Ideas
-
Chocolate Protein Cheesecake Jars: Replace 1 scoop of protein powder with chocolate protein powder and add 1–2 teaspoons unsweetened cocoa powder.
-
Peanut Butter Protein Cheesecake Jars: Swirl 1–2 tablespoons of peanut butter into the filling before chilling.
-
Berry Swirl Cheesecake Jars: Fold in 2 tablespoons of pureed berries for a natural fruity swirl.
-
Pumpkin Spice Cheesecake Jars: Mix in 2 tablespoons pumpkin puree and ½ teaspoon pumpkin pie spice for a seasonal twist.
Nutrition Highlights
-
High Protein: Each jar contains around 20–25 g of protein (depending on the protein powder used), helping with muscle repair and satiety.
-
Low in Sugar: Using natural or low-calorie sweeteners keeps sugar content low without sacrificing taste.
-
Healthy Fats: Almond flour and Greek yogurt provide healthy fats for energy and nutrient absorption.
-
Portable and Portion-Controlled: Each jar is a single serving, perfect for managing calories while enjoying dessert.
Tips for Perfect High Protein Cheesecake Jars
-
Softened Cream Cheese: Make sure the cream cheese is at room temperature for smooth mixing.
-
Protein Powder: Choose a flavor that complements the dessert (vanilla, chocolate, or berry). Some plant-based protein powders may alter texture slightly.
-
Layering: For a professional look, use a piping bag to layer the filling neatly on the crust.
-
Chilling Time: Don’t skip chilling—this ensures the cheesecake filling firms up and develops a creamy texture.
Why These Cheesecake Jars Work
-
Convenient: No slicing or messy plates—perfect for on-the-go.
-
Versatile: Customize with flavors, toppings, or layers to suit your taste.
-
Healthy Indulgence: High protein, controlled sugar, and nutrient-rich ingredients make it guilt-free.
-
Meal Prep Friendly: Easy to prepare ahead of time for snacks, desserts, or post-workout treats.
Conclusion
These High Protein Cheesecake Jars are a delicious way to enjoy dessert while staying on track with your nutrition goals. They are creamy, satisfying, and packed with protein, making them a perfect option for fitness enthusiasts, busy professionals, or anyone who loves cheesecake without the guilt.
Whether you enjoy them plain, layered with berries, or swirled with peanut butter or chocolate, these jars are flexible, visually appealing, and easy to make ahead. With just a few simple ingredients, you can create a dessert that’s both indulgent and nutrient-rich, perfect for any time of the day.