Cherry Pie Bars
Sweet, tangy, and buttery in every bite
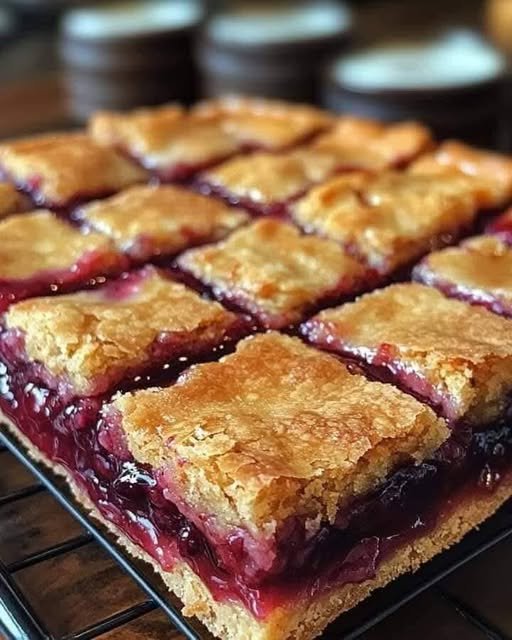
If you love cherry pie but want something faster and easier to serve, Cherry Pie Bars are the answer. These bars combine a buttery shortbread crust, a sweet-tart cherry filling, and a crumbly topping, giving you all the flavors of cherry pie in a portable, sliceable form. They’re perfect for potlucks, picnics, or a simple dessert at home.
Ingredients (12–16 bars)
For the Crust and Topping
-
1 cup (225 g) unsalted butter, softened
-
½ cup (100 g) granulated sugar
-
1 tsp vanilla extract
-
2 cups (250 g) all-purpose flour
-
¼ tsp salt
For the Cherry Filling
-
2 cups fresh or frozen pitted cherries
-
½ cup (100 g) granulated sugar
-
2 tbsp cornstarch
-
1 tsp lemon juice
-
½ tsp vanilla extract
Instructions
Step 1: Preheat & Prepare
Preheat oven to 175°C (350°F). Line a 9×13-inch (23×33 cm) baking pan with parchment paper, leaving a slight overhang to lift the bars easily.
Step 2: Make the Crust
In a large bowl, cream together butter, sugar, and vanilla until smooth.
Add flour and salt and mix until crumbly but holds together when pressed.
Press 2/3 of the dough evenly into the prepared pan to form the crust. Reserve the remaining dough for the topping.
Step 3: Prepare the Cherry Filling
In a medium saucepan, combine cherries, sugar, cornstarch, and lemon juice. Cook over medium heat, stirring frequently, until the mixture thickens and starts to bubble. Remove from heat and stir in vanilla extract.
Tip: If using frozen cherries, no need to thaw—they cook down beautifully.
Step 4: Assemble the Bars
Spread the cherry filling evenly over the crust. Crumble the remaining dough over the top, pressing lightly in some areas but leaving gaps for a rustic look.
Step 5: Bake
Bake in preheated oven for 35–40 minutes, or until the topping is golden and the cherry filling is bubbling.
Remove from oven and let cool completely in the pan on a wire rack.
Step 6: Slice & Serve
Lift the bars from the pan using the parchment overhang. Slice into 12–16 bars, depending on desired size.
Serve as-is, or dust with powdered sugar for a pretty finish.
Tips for Perfect Cherry Pie Bars
-
Use firm, fresh cherries for best texture; frozen also works.
-
Don’t overbake—the filling should remain juicy.
-
Chill before slicing for cleaner cuts.
-
Customize: add almond extract or toasted almonds for extra flavor.
Variations
-
Cherry Chocolate Bars: sprinkle mini chocolate chips over the filling before adding the crumble.
-
Cherry Cream Cheese Bars: add a thin layer of sweetened cream cheese between crust and filling.
-
Gluten-Free: use a 1:1 gluten-free flour blend.
Storage
-
Store in an airtight container at room temperature for up to 3 days.
-
Refrigerate for up to 5 days.
-
Freeze for up to 2 months; thaw at room temperature before serving.
Serving Suggestions
-
Perfect with a scoop of vanilla ice cream or whipped cream.
-
Serve at parties, potlucks, or as a portable dessert for picnics.
-
Great for lunchbox treats or afternoon snacks.
Why You’ll Love These Bars
-
Easier than a traditional pie
-
Portable and easy to slice
-
Sweet and tart in perfect balance
-
Buttery, crumbly, and soft all in one