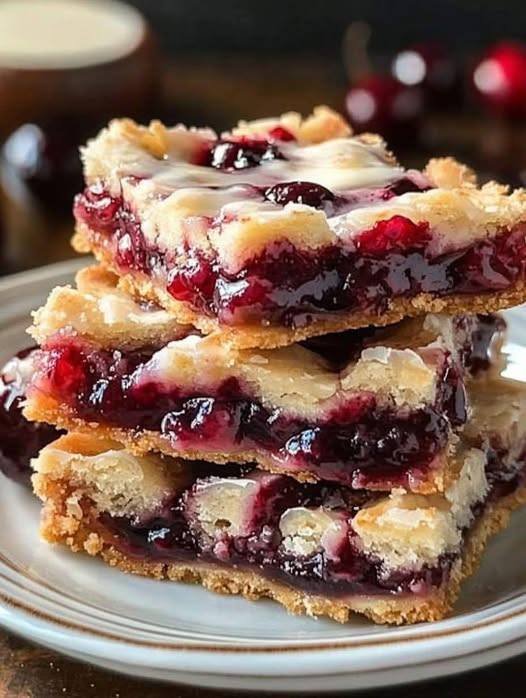
Cherry Pie Bars Recipe
Cherry Pie Bars are everything people love about classic cherry pie—sweet, fruity filling and a buttery crust—but in an easy, sliceable bar form. They’re perfect for potlucks, holidays, bake sales, or anytime you want a dessert that looks impressive without the fuss of rolling pie dough. Made with simple pantry ingredients and a canned or homemade cherry filling, these bars are reliable, delicious, and always a crowd favorite.
Why You’ll Love These Cherry Pie Bars
-
Easier than traditional pie
-
No lattice or pie plate required
-
Soft, buttery crust that doubles as the topping
-
Perfect balance of sweet and tart
-
Easy to transport and serve
Whether you’re baking for a family gathering or just want a comforting dessert at home, cherry pie bars deliver classic flavor with minimal effort.
Ingredients
Crust and Crumb Topping
-
1½ cups all-purpose flour
-
¾ cup granulated sugar
-
½ teaspoon baking powder
-
¼ teaspoon salt
-
¾ cup unsalted butter, cold and cubed
-
1 large egg
-
½ teaspoon vanilla extract
Cherry Filling
-
1 can (21 oz / 595 g) cherry pie filling
Optional Glaze
-
½ cup powdered sugar
-
1–2 tablespoons milk or cream
Instructions
1. Prepare the Pan and Oven
Preheat your oven to 350°F (175°C). Line an 8×8-inch baking pan with parchment paper or lightly grease it. This makes removal and slicing much easier.
2. Make the Dough
In a medium bowl, combine flour, sugar, baking powder, and salt. Add the cold butter cubes and cut them in using a pastry cutter or fork until the mixture resembles coarse crumbs.
Stir in the egg and vanilla extract until the dough begins to come together. The dough will be slightly crumbly but should hold when pressed.
3. Form the Crust
Press about two-thirds of the dough evenly into the bottom of the prepared pan. Use your fingers or the back of a spoon to create a firm, even base.
4. Add the Cherry Filling
Spread the cherry pie filling evenly over the crust, making sure it reaches the edges. Try not to overload the filling, as too much can cause the bars to become soggy.
5. Add the Topping
Crumble the remaining dough evenly over the cherry layer. It doesn’t need to completely cover the filling—some cherries peeking through are perfect.
6. Bake
Bake for 35–40 minutes, or until the top is lightly golden and the filling is bubbling around the edges.
Remove from the oven and allow the bars to cool completely in the pan. This step is important for clean slices.
7. Optional Glaze
Once cooled, whisk powdered sugar and milk together until smooth. Drizzle lightly over the bars for a bakery-style finish.
Tips for Perfect Cherry Pie Bars
-
Cool completely before cutting: Warm bars will fall apart. Cooling allows the filling to set.
-
Use cold butter: This creates a tender, crumbly texture.
-
Line the pan: Parchment paper helps lift the bars out easily.
-
Don’t overbake: Overbaking can dry out the crust.
Variations and Add-Ins
-
Almond Cherry Bars: Add ¼ teaspoon almond extract to the dough.
-
Extra Crunch: Sprinkle sliced almonds on top before baking.
-
Homemade Filling: Use cooked fresh or frozen cherries with sugar and cornstarch.
-
Gluten-Free Version: Substitute a 1:1 gluten-free flour blend.
Storage and Make-Ahead Tips
-
Store cherry pie bars covered at room temperature for up to 2 days.
-
Refrigerate for up to 5 days for longer freshness.
-
These bars freeze well—wrap tightly and freeze for up to 2 months. Thaw overnight in the refrigerator before serving.
Serving Suggestions
Cherry Pie Bars are delicious on their own, but they’re even better served with:
-
A scoop of vanilla ice cream
-
Fresh whipped cream
-
A cup of coffee or tea
Final Thoughts
Cherry Pie Bars are a timeless dessert that combines simplicity with classic flavor. With a buttery crust, sweet cherry filling, and optional glaze, they’re easy to make yet impressive enough for special occasions. Whether you’re baking for guests or just treating yourself, this recipe is one you’ll come back to again and again.