Gluten-Free Small Loaf of Bread in the Air Fryer: Easy, Quick, and Perfectly Soft
Baking gluten-free bread at home can feel intimidating, especially when you don’t want to commit to a full-sized loaf or wait hours for the oven to preheat. That’s where a gluten-free small loaf of bread made in the air fryer comes in. This method is fast, convenient, and ideal for anyone craving fresh bread without the hassle.
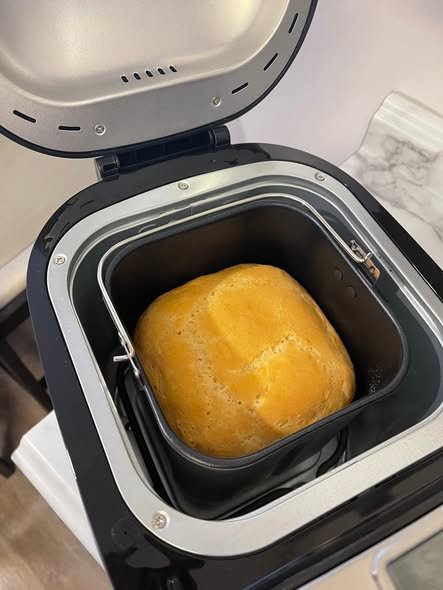
With the right ingredients and technique, an air fryer can produce a gluten-free loaf that’s soft on the inside, lightly golden on the outside, and perfect for everyday use.
Why Make Gluten-Free Bread in the Air Fryer?
Air fryers aren’t just for fries and crispy snacks—they’re excellent for small-batch baking. Making a gluten-free loaf in an air fryer offers several advantages:
-
Faster cooking time than a conventional oven
-
No need to heat the whole kitchen
-
Perfect for small portions or single households
-
Even heat circulation, which helps gluten-free bread rise evenly
-
Energy-efficient and convenient
For gluten-free bakers, small loaves are especially appealing because they stay fresher and reduce waste.
What Makes Gluten-Free Bread Different?
Unlike traditional bread, gluten-free bread doesn’t rely on gluten for structure. Instead, it depends on a combination of gluten-free flours, binders, and moisture to create a stable crumb.
Gluten-free dough is usually more like a thick batter than a kneadable dough. This makes it especially well-suited to air fryer baking, as it doesn’t need shaping or long kneading times.
Key Ingredients for a Gluten-Free Small Loaf
While recipes may vary, most gluten-free air fryer bread includes the following essentials:
Gluten-Free Flour Blend
A good-quality all-purpose gluten-free flour blend works best. Look for one that already contains rice flour, starches, and sometimes xanthan gum.
Binder (Xanthan Gum or Psyllium Husk)
This replaces gluten and helps hold the loaf together. Some flour blends already include it.
Yeast or Baking Powder
-
Yeast gives a more traditional bread flavor and texture.
-
Baking powder creates a quicker, soda-bread-style loaf.
Liquid
Milk, dairy-free milk, or water hydrates the flour and keeps the bread moist.
Fat
Oil or butter improves softness and shelf life.
Egg (Optional)
Egg adds structure and richness, though egg-free versions work well too.
How to Make a Gluten-Free Small Loaf in the Air Fryer
Step 1: Prepare the Batter
Dry ingredients are mixed first to evenly distribute the flour and binder. Wet ingredients are then added, and everything is mixed until smooth. The batter should be thick but spoonable.
Step 2: Rest the Batter
Letting the batter rest for 10–15 minutes allows the flours to absorb moisture, improving texture.
Step 3: Choose the Right Pan
A small loaf tin, mini cake pan, or heatproof dish that fits comfortably in your air fryer basket is essential. Grease it well or line with parchment.
Step 4: Fill and Smooth
Pour the batter into the pan and smooth the top with a spatula. Tap gently to remove air bubbles.
Step 5: Air Fry
Bake at a moderate temperature, usually 160–170°C (320–340°F), until the loaf is set, risen, and lightly golden. Cooking time varies but typically takes 20–30 minutes.
Step 6: Cool Completely
Cooling is crucial. Gluten-free bread continues to set as it cools, and slicing too early can cause a gummy texture.
Tips for Success
-
Don’t Overfill the Pan
Leave room for the loaf to rise without touching the heating element. -
Check Early
Air fryers vary, so start checking for doneness a few minutes before the suggested time. -
Cover if Browning Too Fast
If the top browns quickly, loosely cover with foil. -
Use a Skewer Test
A skewer inserted into the center should come out clean. -
Let It Cool Fully
This improves texture and sliceability.
Texture and Flavor Expectations
A gluten-free small loaf baked in the air fryer is:
-
Soft and moist inside
-
Lightly crisp on the outside
-
Mild in flavor, perfect for sweet or savory toppings
It won’t be as chewy as wheat bread, but it will be satisfying, tender, and far superior to many store-bought gluten-free options.
Serving Suggestions
This small loaf is wonderfully versatile:
-
Toast and top with butter or jam
-
Use for sandwiches or open-faced toast
-
Serve alongside soups and stews
-
Spread with avocado, hummus, or nut butter
-
Use day-old slices for gluten-free croutons
Because it’s a small loaf, it’s ideal for fresh, everyday use.
Storage and Shelf Life
-
Room Temperature: Best eaten within 24 hours
-
Refrigerator: Store sliced in an airtight container for up to 3 days
-
Freezer: Slice and freeze for up to 2 months
-
Reheating: Toast or warm gently to refresh texture
Freezing in slices allows you to enjoy fresh bread whenever you need it.
Variations to Try
Once you’re comfortable with the basic method, try these variations:
-
Seeded Loaf: Add sunflower, pumpkin, or chia seeds
-
Herb Bread: Mix in rosemary or thyme
-
Garlic Bread: Add garlic powder and olive oil
-
Dairy-Free: Use plant-based milk and oil
-
Egg-Free: Replace egg with flaxseed or psyllium gel
These variations keep the recipe exciting while staying gluten-free.
Why This Method Works So Well
The air fryer’s rapid, circulating heat helps gluten-free bread rise evenly and bake through without drying out. For small loaves especially, it delivers consistent results with minimal effort.
This approach is perfect for gluten-free bakers who want fresh bread without long prep times, large batches, or complicated equipment.
Final Thoughts
Making a gluten-free small loaf of bread in the air fryer is a game-changer for quick, homemade baking. It’s practical, efficient, and produces soft, flavorful bread with minimal effort. Whether you’re newly gluten-free or simply looking for a small-batch solution, this method offers convenience without sacrificing quality.
Once you try it, you’ll see how easy it is to enjoy fresh, gluten-free bread whenever you want—no oven required.